Nov 8
Hanging Artwork Made Easy
Hanging artwork may be perceived as a daunting task, but these tricks will make it simple and fast. Here are some tips to easily decorate your space.
Some supplies that will be helpful to gather before you start:
-
Hammer
-
Tape measurer/ruler
-
Nails
-
Level
-
Pencil
-
Stud finder (optional)
-
Painters tape (optional)
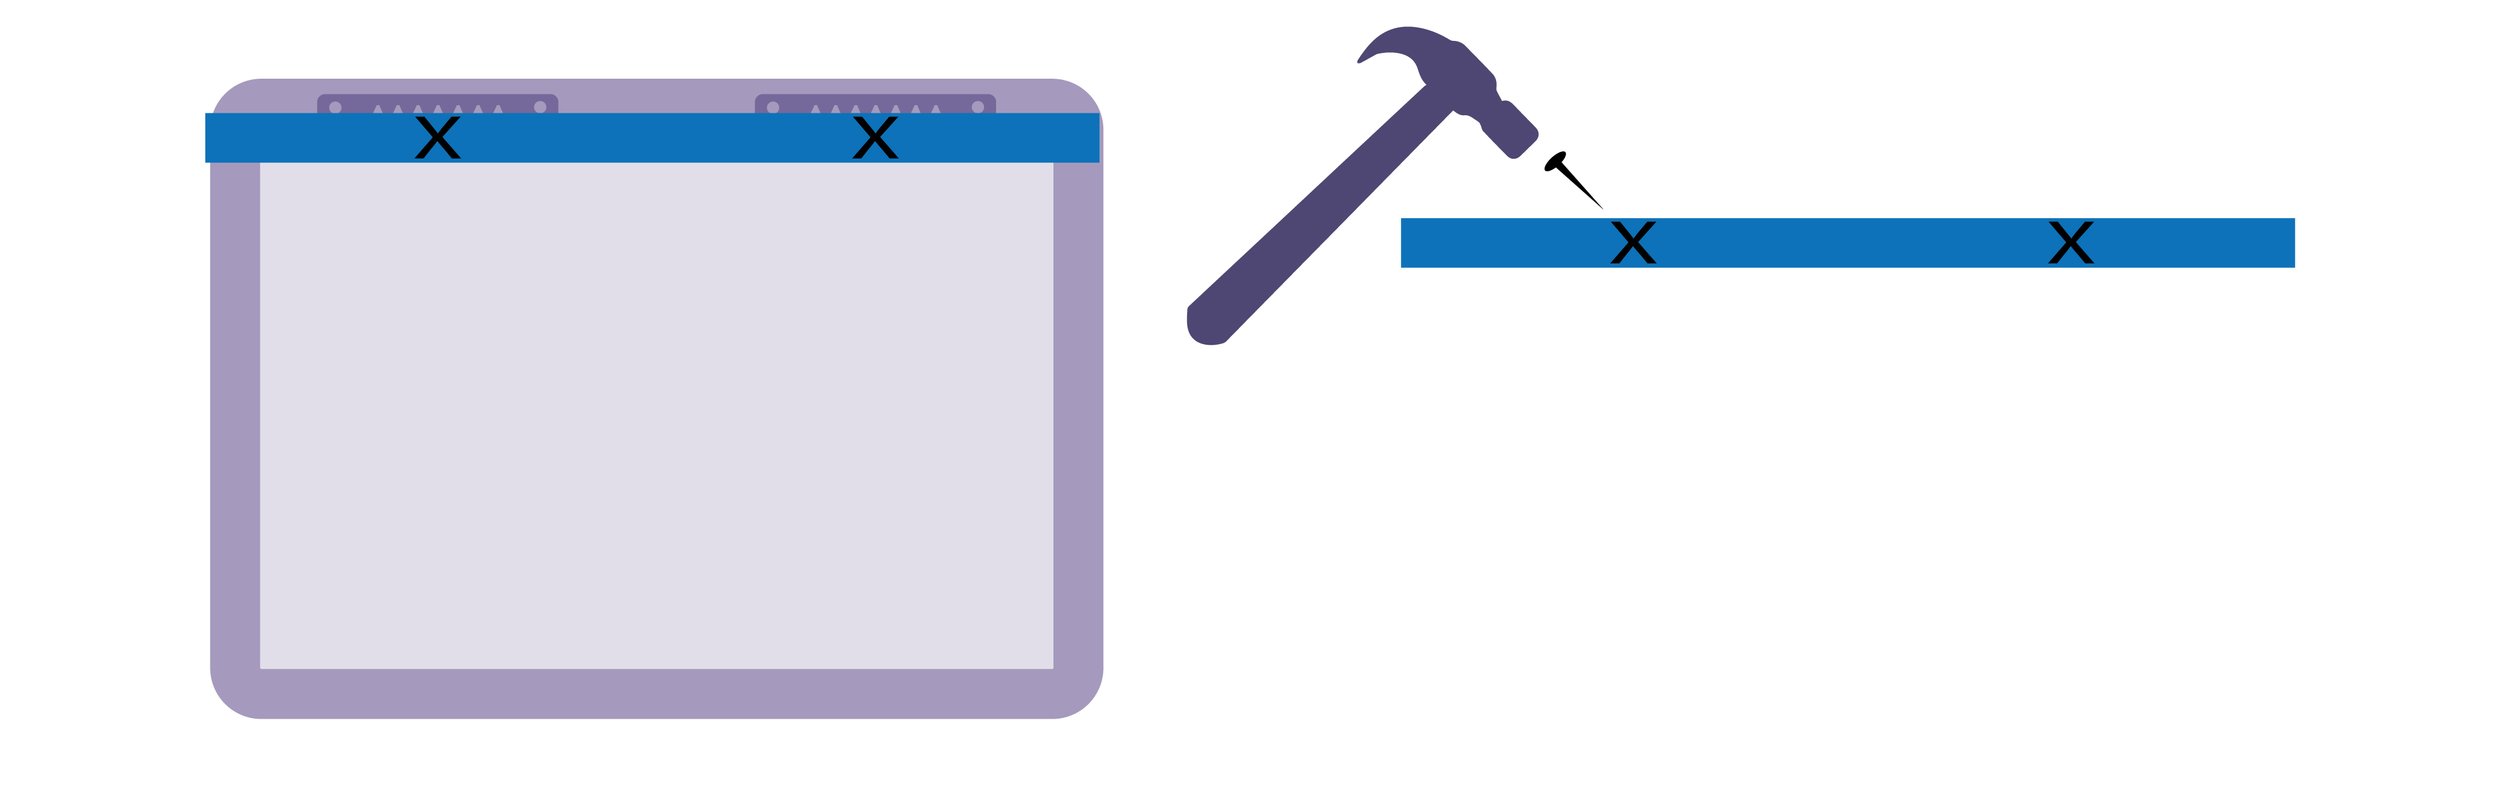
Hanging lightweight artwork:
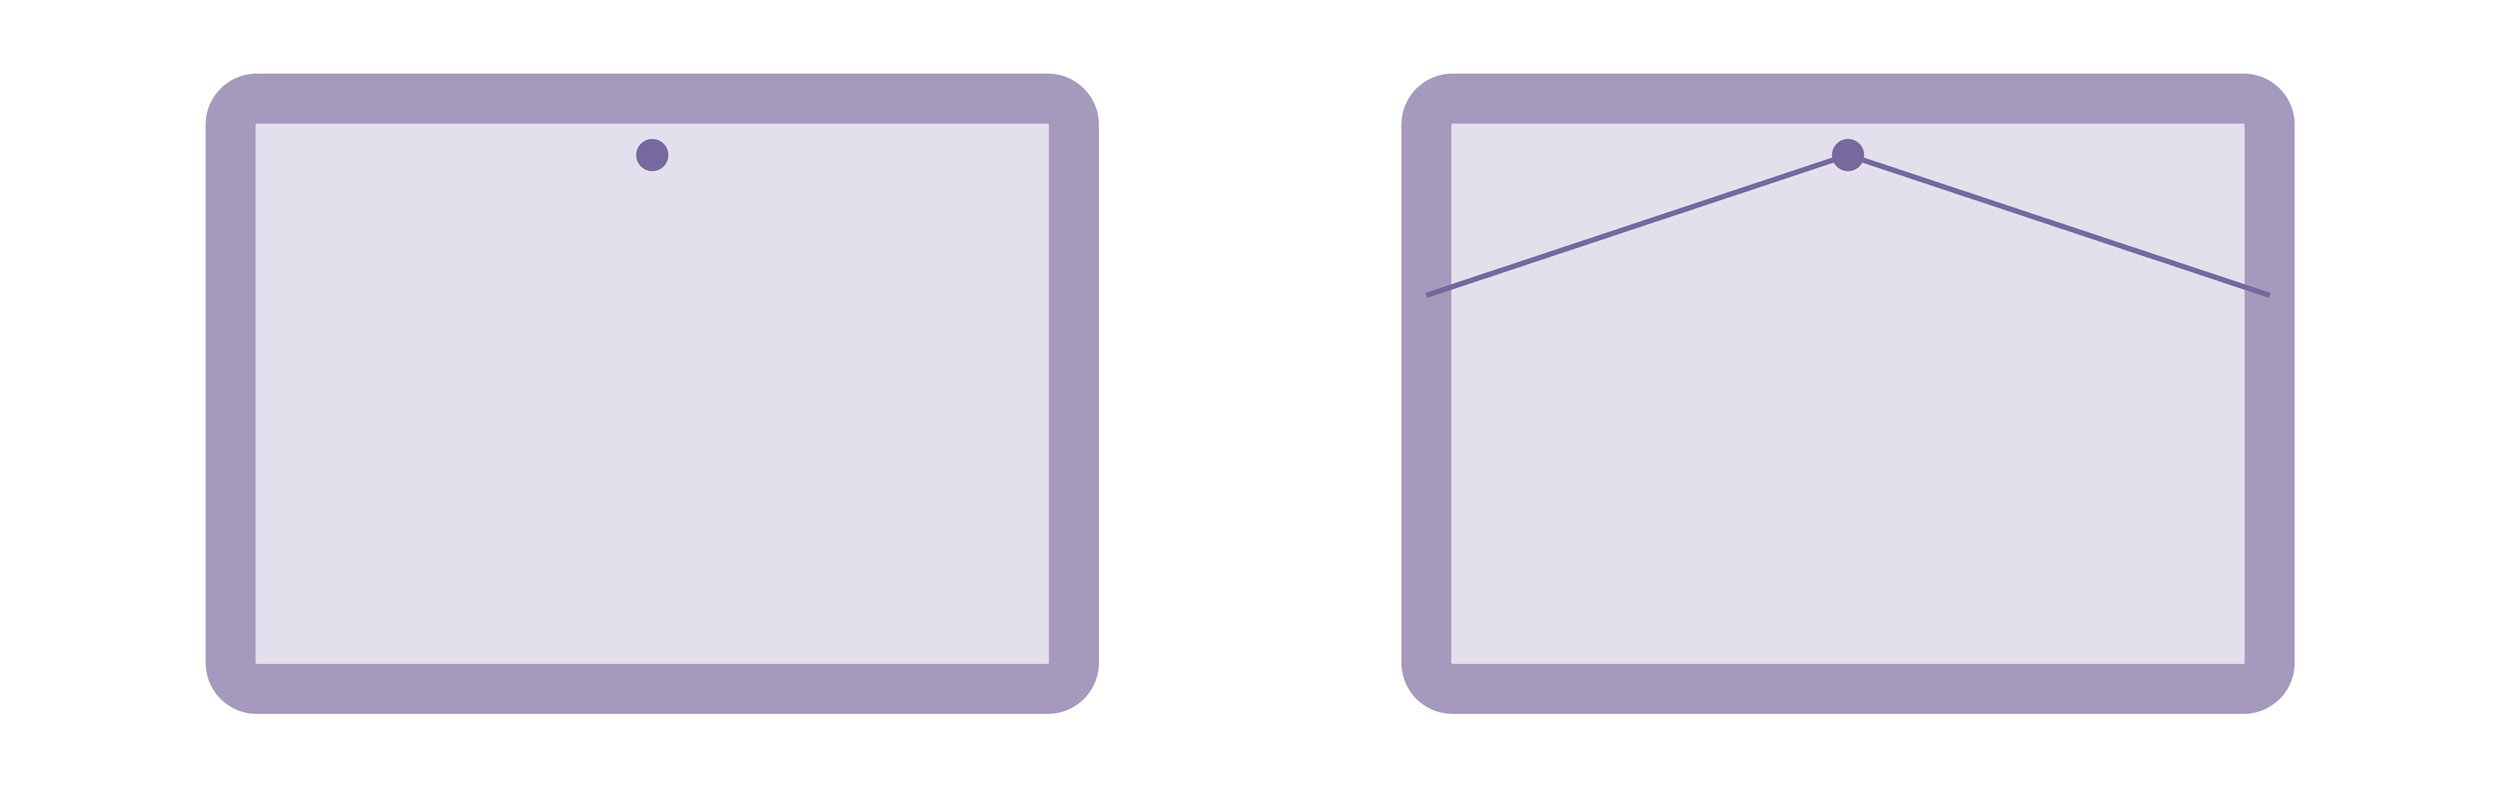
Hammer 1 nail into the wall where the center of the artwork will hang. This simple method works great for small to medium canvases and prints with or without wire backing. The wooden stretcher bar on canvases rest right on the nail heads.
Hanging medium to large sized artwork:
When hanging a medium sized canvas (width greater than 24”) place 2 nails spaced apart (that are level) to hold the weight of the artwork. For heavier canvases/framed prints with wire backings use a picture hook for added security. The wooden stretcher bar on canvases rest right on the nail heads.
Tips and Tricks
Finding the right sized artwork
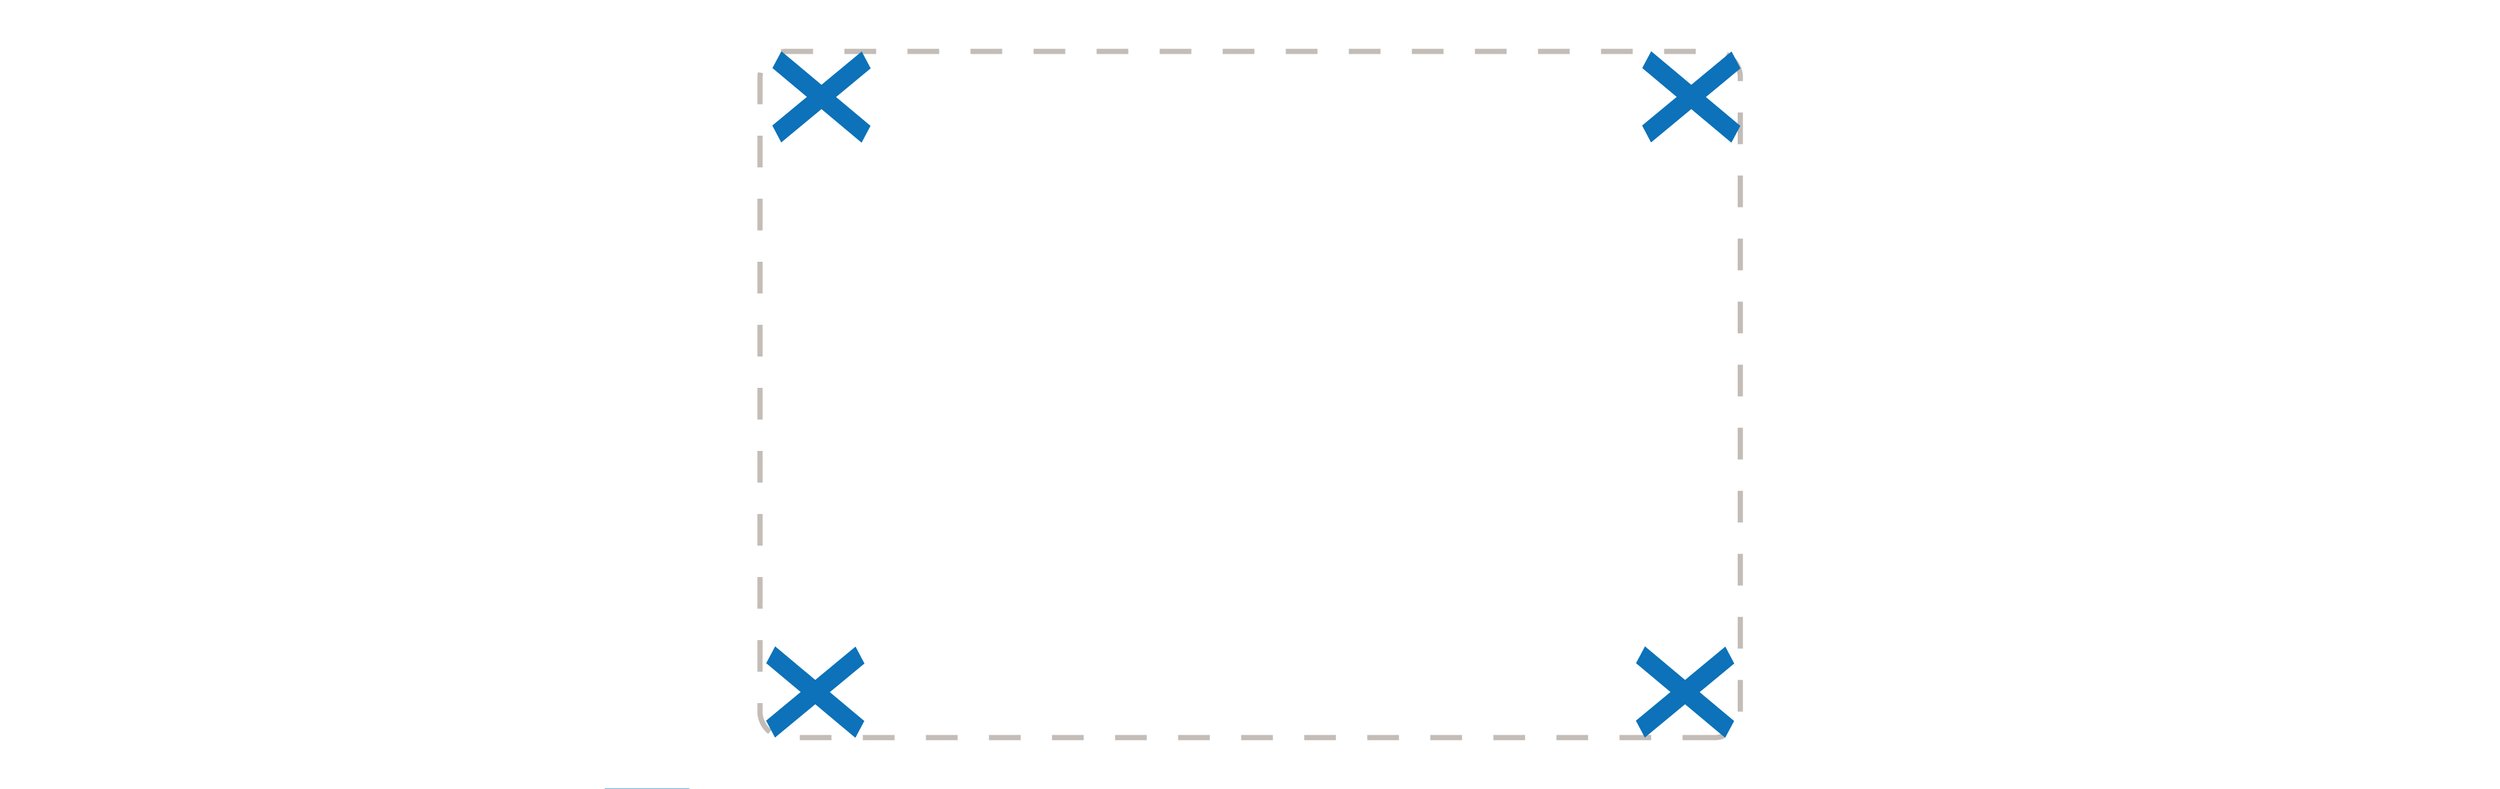
An easy way to tell the correct size painting for the space is to place tape in the four corners where the image would be placed. It gives a great visual of the size on the wall with little effort.
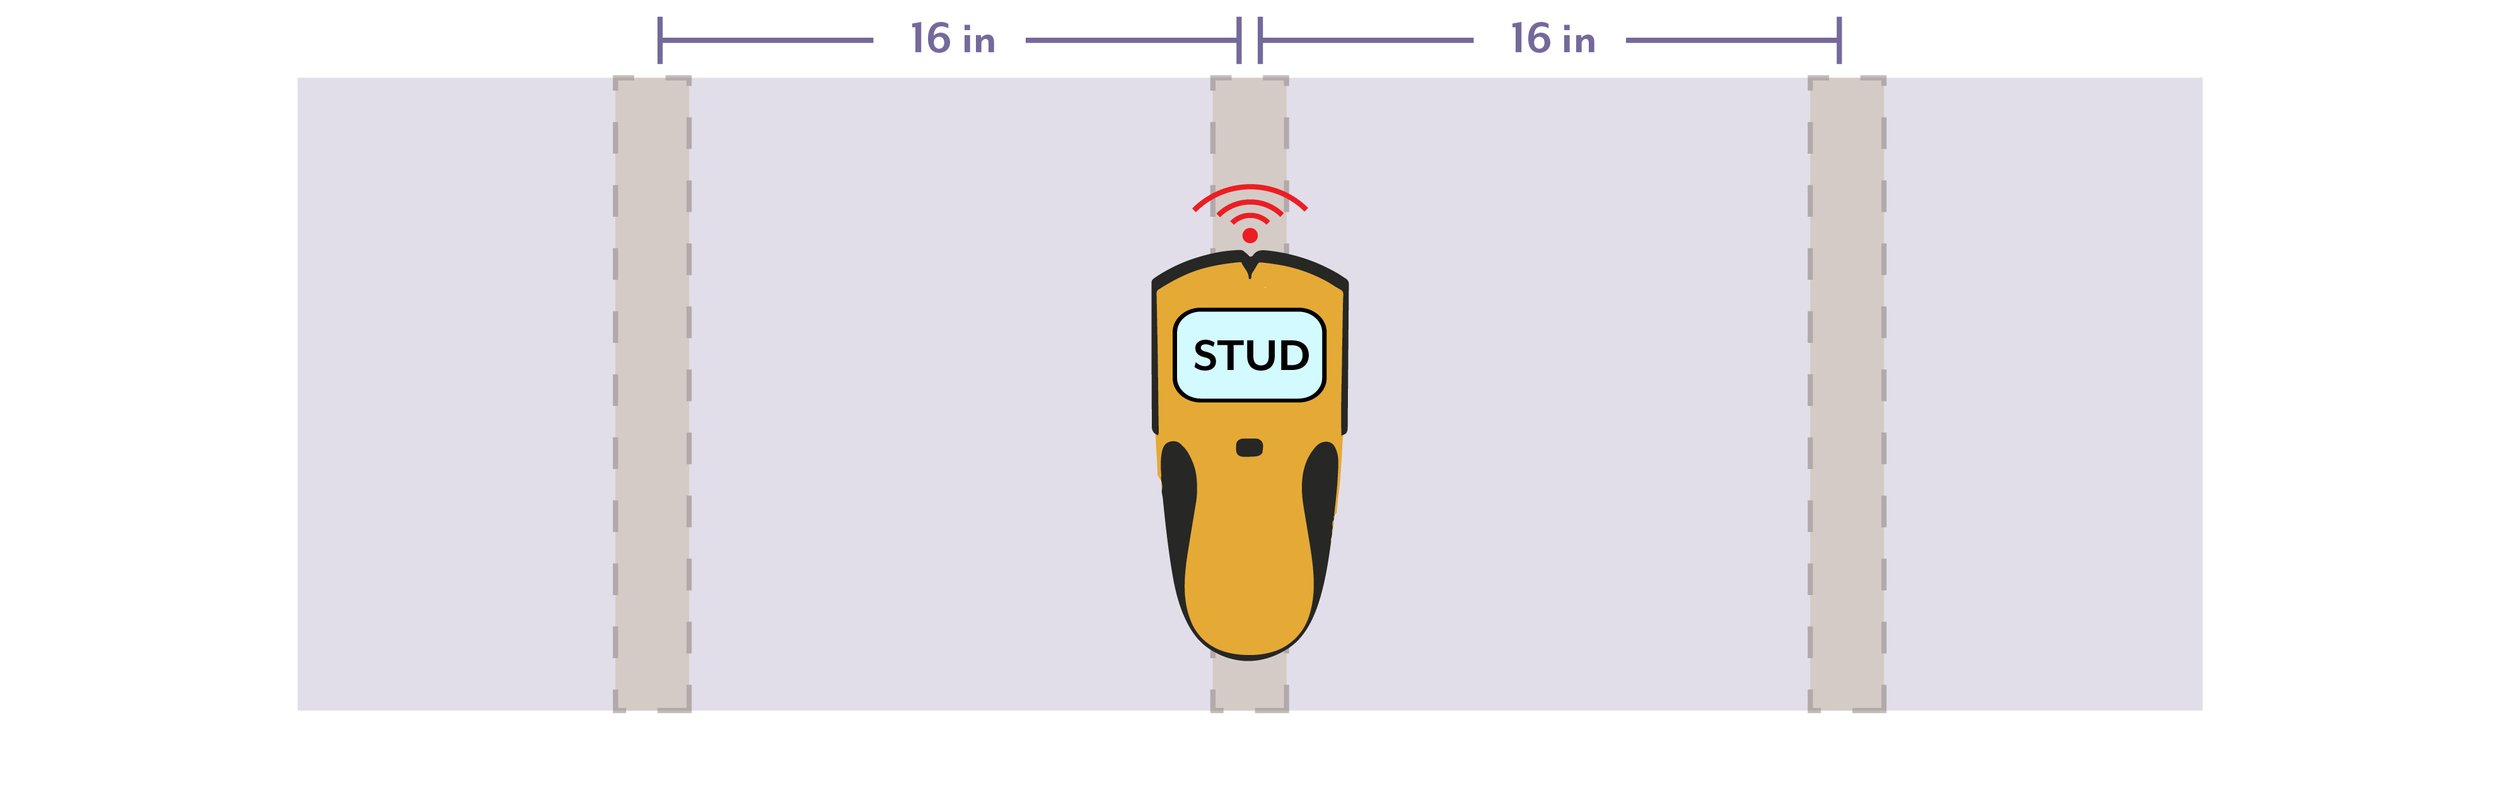
Use a stud finder
Stud finders take the guess work out of hanging artwork. Studs are spaced 16” apart and measure roughly 1.5” thick. Wooden studs are much more secure than relying on drywall (which has very little structural integrity.) Use studs to your advantage when hanging heavy/large pieces of art.
Hang artwork at eye level
As a rule of thumb, hang your artwork at eye level (usually around 60 inches from the floor.) This is a trick that museums and our art gallery uses. This tip doesn’t apply when artwork is hung over a bed or couch. When hanging artwork above furniture hang the artwork 5-10 inches above the piece.

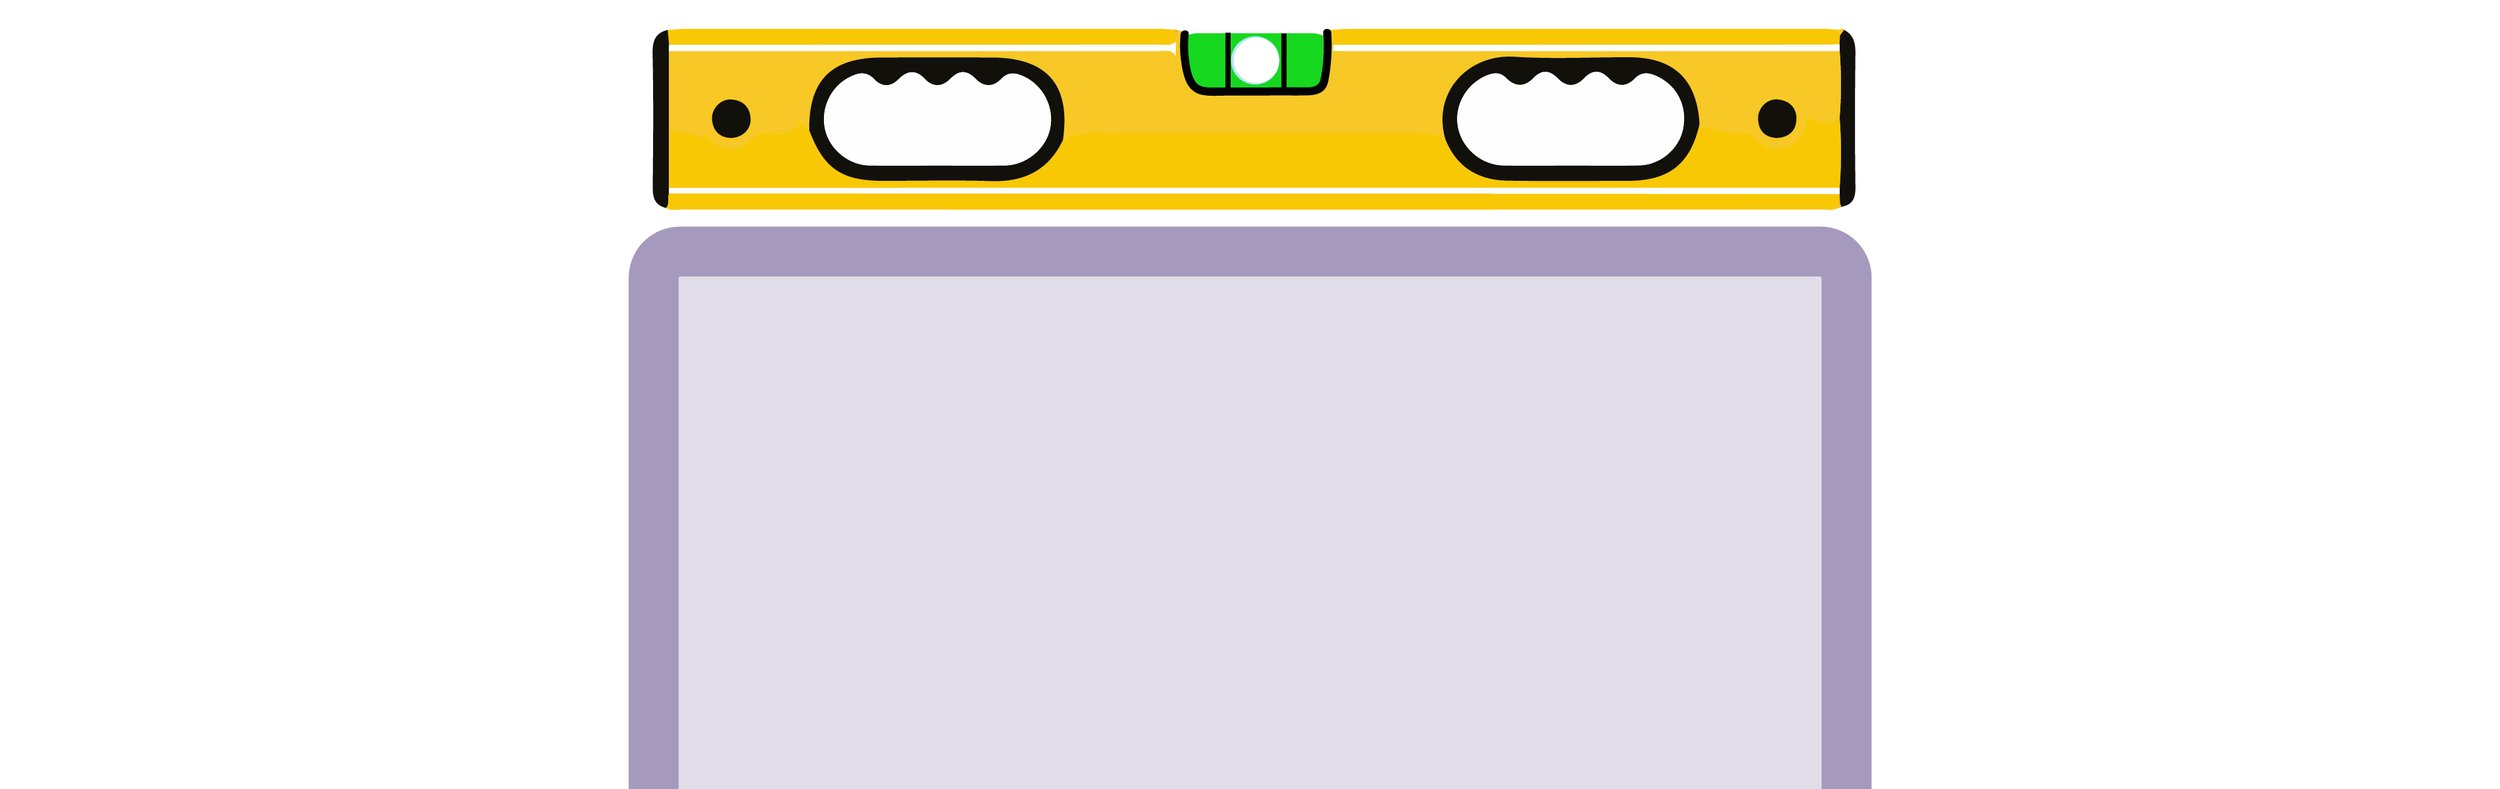
Use a level
Our eyes can play tricks on us, and sometimes slanted ceilings can create an illusion that crooked artwork is straight even when it isn’t. Err on the side of caution and take this extra step.
Use painters tape
Cut a piece of painters tape to the length of your piece of artwork and stick it to the back. Take a pencil and mark where your nail(s) will go. Now remove the painters tape and stick the tape to the desired hanging location. Make sure that your tape is level before proceeding. Hammer the nail(s) through the tape and remove tape. The tape will rip away from the nail(s) and ta-da! You are all set.
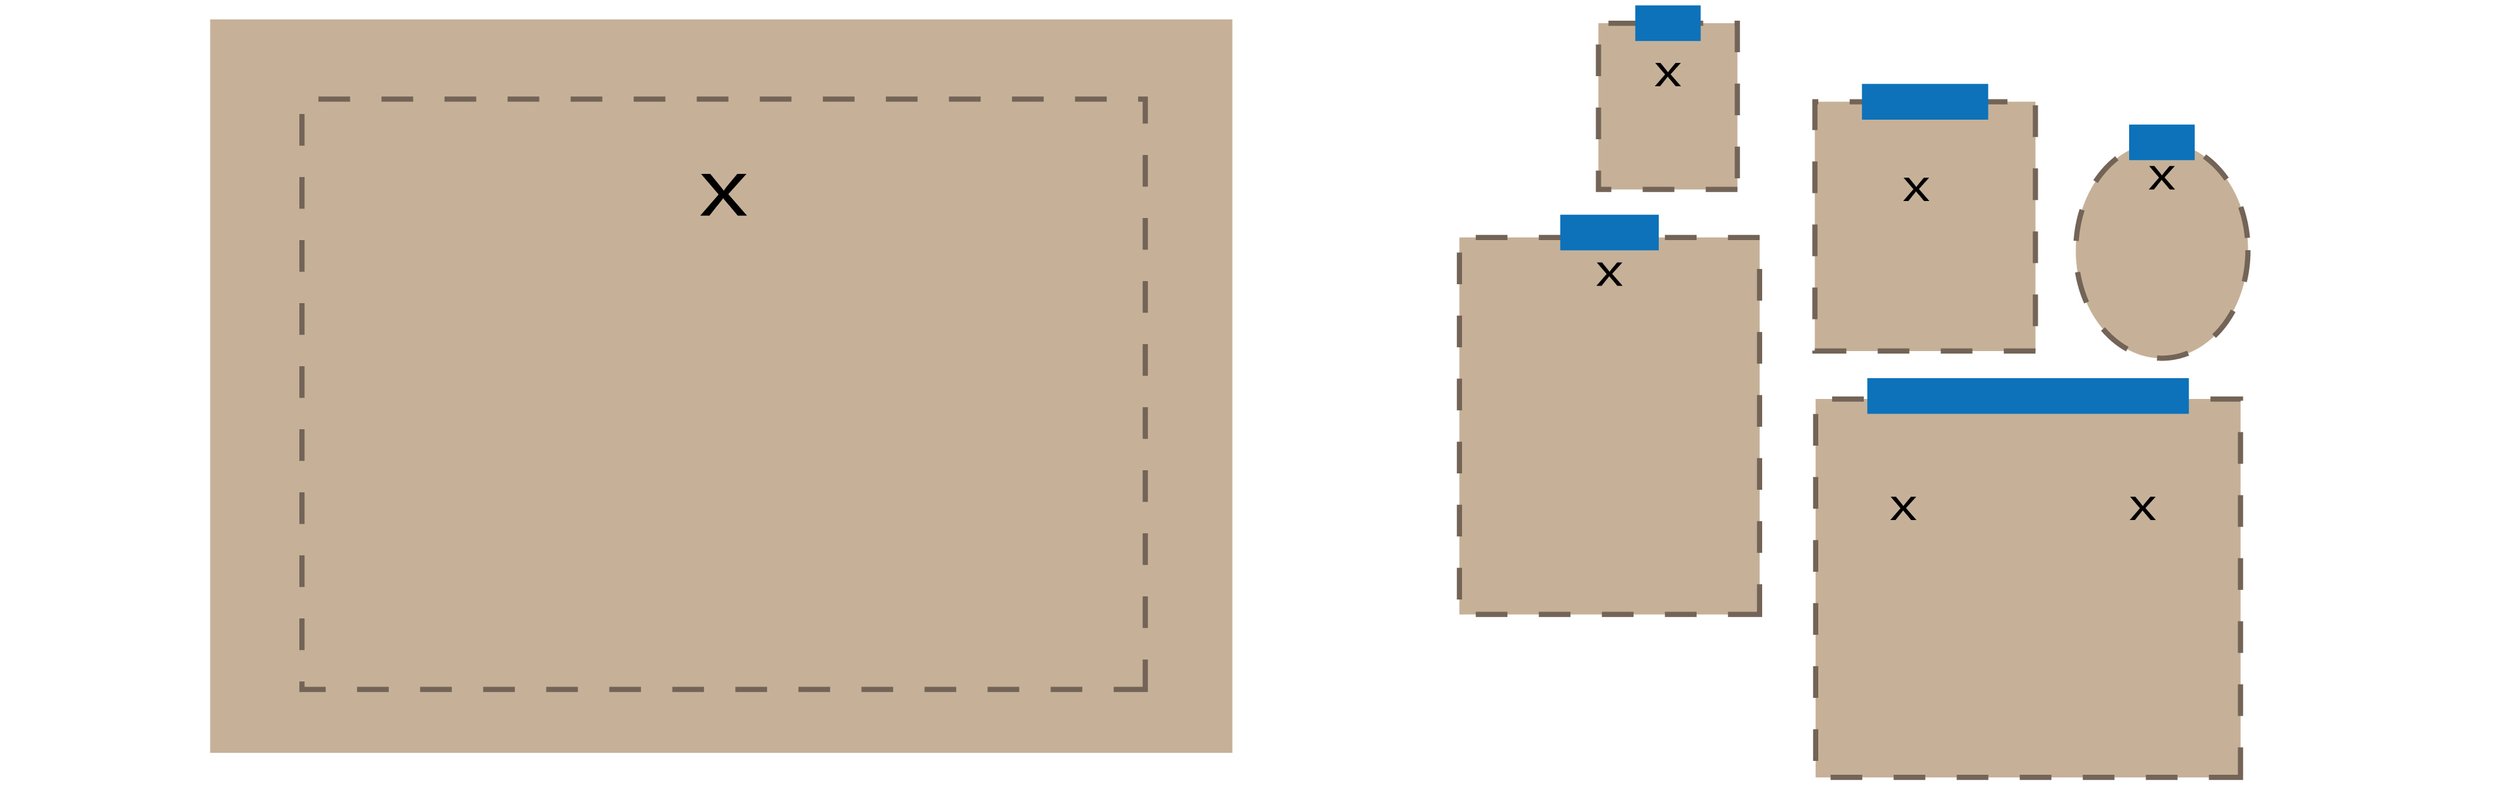
Use butcher paper to lay out a gallery wall
Have you ever arranged artwork on the floor perfectly and then attempted to recreate the spacing and order on the wall? It is nearly impossible. Try using butcher paper and tracing the artwork and their nail locations onto the butcher paper. Then cut out the shapes and use painters tape to arrange them on the wall. This method allows you to use the butcher paper to make hanging much easier as well since you will know exactly where to hammer the nails. Hammer the nail(s) directly through the paper and rip the paper away when finished.
Hope these simple suggestions help to make your decorating process smooth and enjoyable. Artwork can magically transform a room with the right tools and methods.
Virtual Home Visit
Preview Madaras art on your walls before you buy! Send us a photo of your blank wall to get started with custom art suggestions for space.